- Animated textures
Use image sequences formats (jpeg, png, etc.), instead of movie formats (avi, mp4, etc.) or else it will not work on the farm.
- Cloud Manager on MacOS Catalina startup.
With the new OS for Mac you need to allow the cloud manager inside Security & Privacy.
To do this, open up System Preferences -> Security & Privacy and start the cloud manager. Hit cancel when you get a warning.
After that the cloud manager will show up in the Security & Privacy settings. Hit allow and you can now open the cloud manager.
Soon we will have a OS certificate that will eliminate this problem.
- Custom Plugin Version
Our plugin is so intelligent that it will detect all your plugins and also what version you are using. By default all these things happen automatically.
For example, when you are using Redshift our plugin will check your version and use this on the farm. So it doesn't matter if you are on a very old release or the latest. We've got you covered. The same thing happens to FlipFluids, Octane or any Luxcore ect.
The custom plugin field is something that is used when we give you support. Maybe a version is not working correctly on your job. And with this we can give you access to other versions.
The replace button can overwrite the auto search, meaning that you have to enter everything manually. Again is something that is used while giving support.
- Custom Pool
A pool is a selection of nodes that we have available. This option can be useful for test frames or single frames. Don't use this for all your renders because the real speed of a render farm comes with amount of nodes you get.
Here some examples:
ENTER: CPU
You will get the strongest nodes available. All these nodes have Cinebench scores over 3000. Good for single frames or quick test renders.
ENTER GPU
In this pool there are only GPU machines with 4 cards or more active. Being 4 times 2080 ti or 3090 cards.
ENTER MEMORY
Enter this if you need nodes with more than 64 gb of memory.
- Higher costs than calculated
The price calculator is an estimate, this is due to the many variables that come with rendering.
The most common problem is the startup and pre-calculation time. Since by default every node gets a single frame, each time a frame starts it needs to start Cinema 4D and load the project. With heavy geometry or objects this can take 1 or 2 min. After that, there are maybe startup calculations like simulations, GI, ect.
When you have render times under 10 min per frame you lose time and thus credits with each frame.
We made a fix for this called: Custom slice number. Where you feed multiple frames into one server.
If your are still having doubts about the costs please send us this information:
- Your workstation specs (Processor, GPU and memory installed).
- Your project specs (Amount of frames, time to complete a single frame).
- The name of your project that you've submitted to the farm.
- Optional: copy the log file from your project folder inside an email for us to see all the details.
- How does the custom plugin feature work?
Drop & Render made a very unique system when it comes to working with third party plugins. On our farm we have all versions of the plugins we support.
Here's how it works!
When you click the 'check scene' button in our plugin, we will go over your scene and check all active third party plugins. After that we check what version you are using. All this happens in the background, meaning that you don't have to do anything.
For example:
You are working with Redshift as your render engine and X-Particles for your particles simulations. Our plugin will detect your versions and use this to create environment variables on our farm. When you submit the job it will load your plugin versions. This way we eliminate version differences, making sure your renders will come out like you created them.
We always have the latest releases ready, but you can always contact us to make sure.
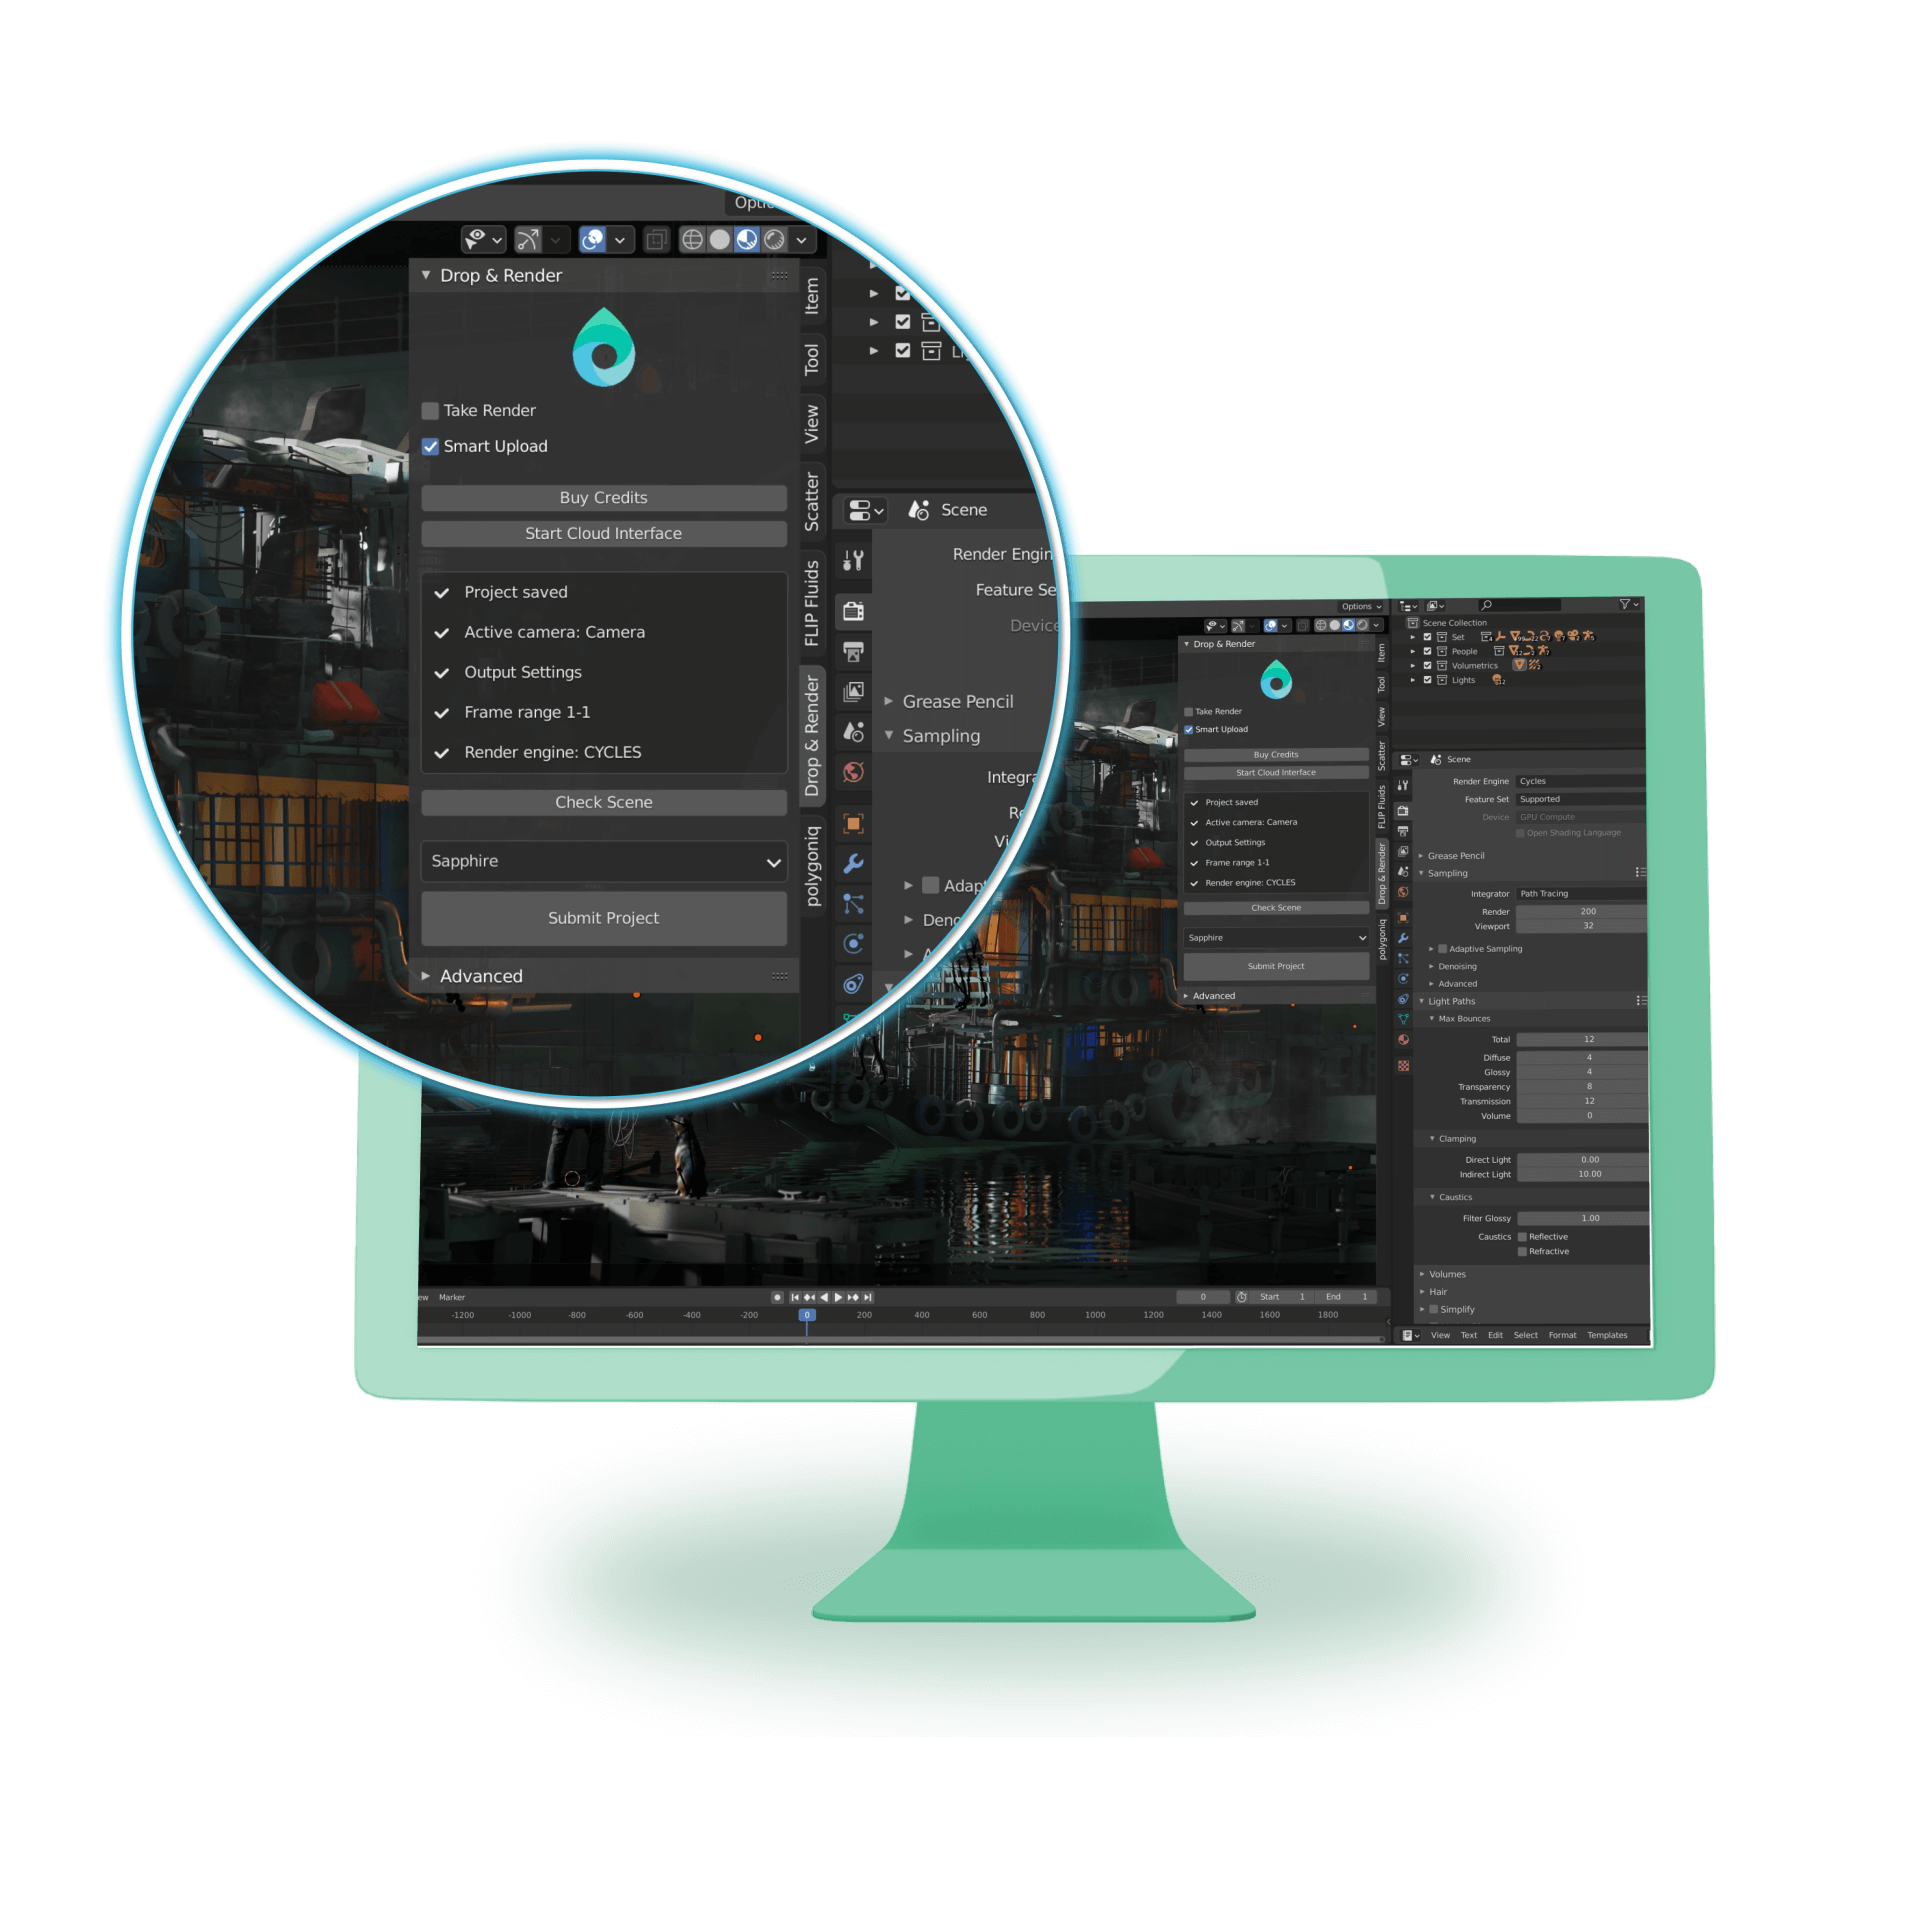
- How to render a single image with Tile Rendering.
In our new update Tile Rendering is as easy as it can be.
In you have a big still image click the "Tile Render" checkbox inside the Drop & Render Blender add-on. Now projects will be rendered on multiple machines.
- Nothing happens when I click submit
Follow the troubleshoot steps below:
- Log in to the cloud manager.
- Make sure to install the cloud manager on the default location.
Mac: /Applications/DropandRender
PC: C://Program Files/SquidNetSoftware/DropandRender/
- Reset the advanced tab inside the C4D plugin.
Still not working, please send us the log file that is inside your project folder.
- Some really useful tips!
30% FASTER
If your render finishes within 5 min per slice on the farm you can change the custom slices to speed up the render farm without extra costs. By default every nodes gets a single frame, when you up the slice number, nodes get multiple frames before sending them to you again. This saving startup time and possible calculations from the project.
To do this: go to the advanced tab in the plugin and change the slice number. A good average number is 20 min per slice. So if your frame is taking 5 min, the slice number is 4 (20/5).
Here you can find a video about it:
Custom Slice Number
CHANGE PRIORITY AFTER SUBMISSION
You can change your priority while rendering or waiting in the queue. This can be helpful when you already submitted your job and you notice the long waiting line or you want to make sure your project keeps rendering.
To do this: Open the cloud manager and right click on your job. Click change render queue. This wil open a list where you can change the priority.
Here you can find a video about it:
- There is no window shown to install the plugin.
Follow the steps below:
1. Do you have Blender installed on the default location?
PC: C:/Users/%username%/AppData/Roaming/Blender Foundation/Blender/%version%
MAC: /Users/%username%/Library/Application Support/Blender/%version%
If not, the cloud manager is not able to find your install and you need to manually add the Application Path. See the steps below:
- Open the cloud manager
- Click help on top of the page and select -> Preferences
- Open the Plugin Manager
- Right click on the empty field and select "Add"
- Select the application profile and the Root Application path
- Click Apply.
- What add-ons do you support
We actually support all versions, all the latest releases but also older releases. This is applicable for every plugin we support.
Our Blender add-on is so smart that it will detect all your plugins and also the versions of your plugin. After that we create a Blender instance of your setup.
This way we eliminate version issues causing a way higher succes rate on your jobs.
You can expect that we always have the latest releases of all plugins. We update everything daily.
- What version of Blender do we support?
You can find an overview of all supported versions, add-ons and engines over here:
https://blender.dropandrender.com/blender-render-farm
- What version of Octane are you using?
We support all versions! How is that possible?
We use environment variables to re-create your version of Blender. So it doesn't matter if you are on the latest release or a release that is a year old. We've got you covered! Pretty cool right?
The plugin will auto detect your version.
- What version of Redshift are you using?
We support all versions! How is that possible?
We use environment variables to re-create your version of Blender. So it doesn't matter if you are on the latest release or a release that is a year old. We've got you covered! Pretty cool right?
The plugin will auto detect your version.